学习JQuery实现网页中分隔条的功能
- 时间:2015年04月02日 15:31:19 来源:魔法猪系统重装大师官网 人气:9304


在C/S系统中有专门的分隔条控件,很方便实现,但在Asp.net中却没有。本文介绍了一种使用JQuery技术实现分隔条的功能。
Javascript代码如下,将该代码保存成JS文件后在HTML中引用。
jsplit
1 jQuery.noConflict();
2 jQuery.fn.extend({
3 jsplit: function (j) {
4 return this.each(function () {
5 j = j || {};
6 j.Btn = j.Btn || {};
7 j.Btn.oBg = j.Btn.oBg || {};
8 j.Btn.cBg = j.Btn.cBg || {};
9 var jun = { MaxW: "600px"
10 , MinW: "260px"
11 , FloatD: "left"
12 , IsClose: false
13 , BgUrl: ""
14 , Bg: "#fff"
15 , Btn: { btn: true
16 , oBg: { Out: "#333", Hover: "orange" }
17 , cBg: { Out: "#333", Hover: "orange"}
18 }
19 , Fn: function () { }
20 }
21 j.MaxW = parseInt(j.MaxW) || parseInt(jun.MaxW);
22 j.MinW = parseInt(j.MinW) || parseInt(jun.MinW);
23 j.FloatD = j.FloatD || jun.FloatD;
24 j.IsClose = j.IsClose != undefined ? j.IsClose : jun.IsClose;
25 j.BgUrl = j.BgUrl || jun.BgUrl;
26 j.Bg = j.Bg || jun.Bg;
27 j.Btn.btn = j.Btn.btn != undefined ? j.Btn.btn : jun.Btn.btn;
28 j.Btn.oBg.Out = j.Btn.oBg.Out || jun.Btn.oBg.Out;
29 j.Btn.oBg.Hover = j.Btn.oBg.Hover || jun.Btn.oBg.Hover;
30 j.Btn.cBg.Out = j.Btn.cBg.Out || jun.Btn.cBg.Out;
31 j.Btn.cBg.Hover = j.Btn.cBg.Hover || jun.Btn.cBg.Hover;
32 j.Fn = j.Fn || jun.Fn;
33 var antiD = j.FloatD == "left" ? "right" : "left";
34 if (j.MinW > j.MaxW) {
35 var amax = j.MaxW;
36 j.MaxW = j.MinW;
37 j.MinW = amax;
38 };
39 var _self = this;
40 var Close = false;
41 jQuery(_self).css({ position: "relative", float: j.FloatD, overflow: "hidden", padding: "0px" });
42 jQuery(_self).wrapInner("
43 jQuery(_self).children(".jsplit-c").append("");
44 var dw = jQuery(_self).width();
45 var jsplitc = jQuery(_self).children(".jsplit-c");
46 var jsplite = jsplitc.children(".jsplit-e");
47 var jsplith = jsplite.children(".jsplit-e-handle");
48 if (j.Btn.btn == false) { jsplith.css({ display: "none" }) };
49 if (jQuery.browser.msie) { document.execCommand("BackgroundImageCache", false, true); }
50 if (dw > j.MaxW) { jQuery(_self).css({ width: j.MaxW }); }
51 if (dw < j.MinW) { jQuery(_self).css({ width: j.MinW }); }
52 jsplite.css({ background: j.Bg, "background-image": j.BgUrl, opacity: 0 })
53 if (j.IsClose != false) {
54 jsplith.css({ background: j.Btn.cBg.Out, "background-image": j.BgUrl })
55 _selfclose();
56 } else {
57 jsplith.css({ background: j.Btn.oBg.Out, "background-image": j.BgUrl })
58 }
59 jsplith.hover(function () {
60 if (Close == false) {
61 jQuery(this).css({ background: j.Btn.oBg.Hover, "background-image": j.BgUrl })
62 } else { jQuery(this).css({ background: j.Btn.cBg.Hover, "background-image": j.BgUrl }) }
63 }, function () {
64 if (Close == false) {
65 jQuery(this).css({ background: j.Btn.oBg.Out, "background-image": j.BgUrl })
66 } else { jQuery(this).css({ background: j.Btn.cBg.Out, "background-image": j.BgUrl }) }
67 })
68 jQuery(_self).hover(function () { if (Close == false) jsplite.stop().animate({ opacity: 0.85 }, 200) }, function () { if (Close == false) jsplite.stop().animate({ opacity: 0 }, 2000) })
69 jsplite.mousedown(function (e) {
70 j['Fn'] && j['Fn'].call(_self);
71 var screenX = e.screenX, w = jQuery(_self).width();
72 jQuery(document).mousemove(function (e2) {
73 curW = j.FloatD == "left" ? w + (e2.screenX - screenX) : w - (e2.screenX - screenX);
74 if (curW >= j.MaxW) { curW = j.MaxW; };
75 if (curW <= j.MinW) { curW = j.MinW; };
76 jQuery(_self).css({ width: curW });
77 dw = curW;
78 });
79 jQuery(document).mouseup(function () {
80 jQuery(document).unbind();
81 });
82 if (Close == true) {
83 jQuery(this).css({ cursor: "e-resize", opacity: 0.8 });
84 jQuery(_self).animate({ width: dw }, 200);
85 Close = false;
86 };
87 return false;
88 });
89 jsplite.dblclick(function () {
90 if (Close == false) {
91 _selfclose();
92 };
93 return false;
94 });
95 jsplith.click(function () {
96 if (Close == false) {
97 _selfclose();
98 };
99 return false;
100 });
101 function _selfclose() {
102 jsplite.css({ cursor: "pointer", opacity: 1 });
103 jsplith.css({ background: j.Btn.cBg.Out, "background-image": j.BgUrl });
104 jQuery(_self).animate({ width: "6px" }, 400);
105 Close = true;
106 }
107
108
109 });
110 }
111 });
按以下步骤修改HTML文件:
1. 增加对JQuery和刚刚生成的jsplit.js文件的引用。
<script language='javascript' src='jquery-1.4.4.min.js'></script>
<script language='javascript' src='jsplit.js'></script>
2. 为要被拖动大小的DIV或TD定义ID。
| test | test Table |
3. 增加Javascript调用Split。
<script type="text/javascript">
$(document).ready(function(){
jQuery('#tt').jsplit();
});
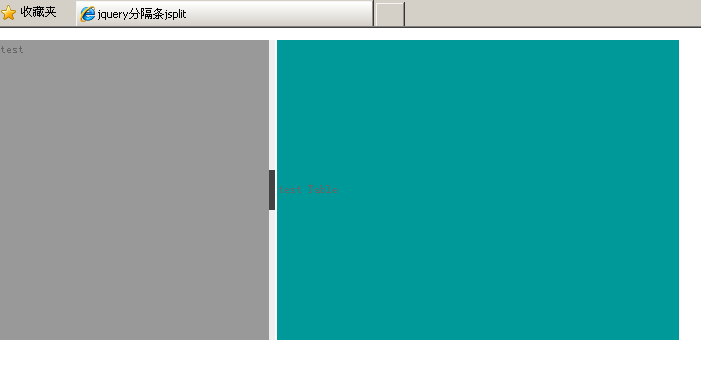
</script>这样就实现了客户端的分隔条的功能,如下图所示: